How to Set Up a VPN on Your Router
Follow our step-by-step guide to install a VPN on any router you own. After that, all devices connected to your WiFi will enjoy VPN security, privacy, and freedom.
VPNs don’t have ready-made apps for routers, meaning you’ll have to set one up manually. Furthermore, not all routers are the same. Your easiest option is a pre-flashed VPN router, which comes with pre-installed VPN-compatible software. That way, you don’t have to go through the complicated process of flashing the right firmware.
However, pre-flashed routers are much more expensive than other devices, which might put off some users. If you’re one of them, there are two other options: (A) Manually setting up your VPN on a router that supports VPN clients, or (B) flashing your router with new firmware.
VPN on Router: Method A in Brief
Time needed: 5 minutes
Get your VPN up and running on your router in no time. Scroll a bit further for the full detailed guide.
- Type your router’s IP address in any browser’s address bar.
You’ll find it on the back of your router or on your Mac (system preferences) or Windows (control panel).
- Enter your router’s username and password.
Use strong and unique passwords for all your accounts, even your router. Our password meter and generator could help.
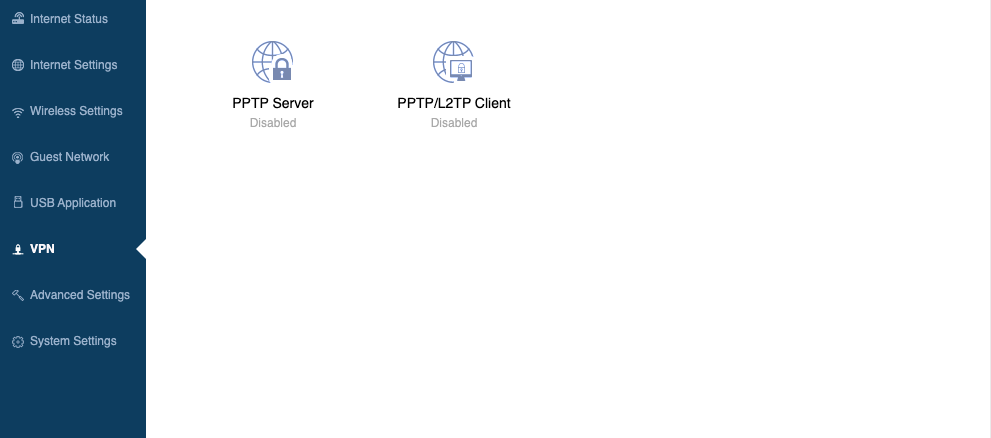
- Click “VPN” from the panel on the left.
Follow that up by choosing between PPTP or L2TP.
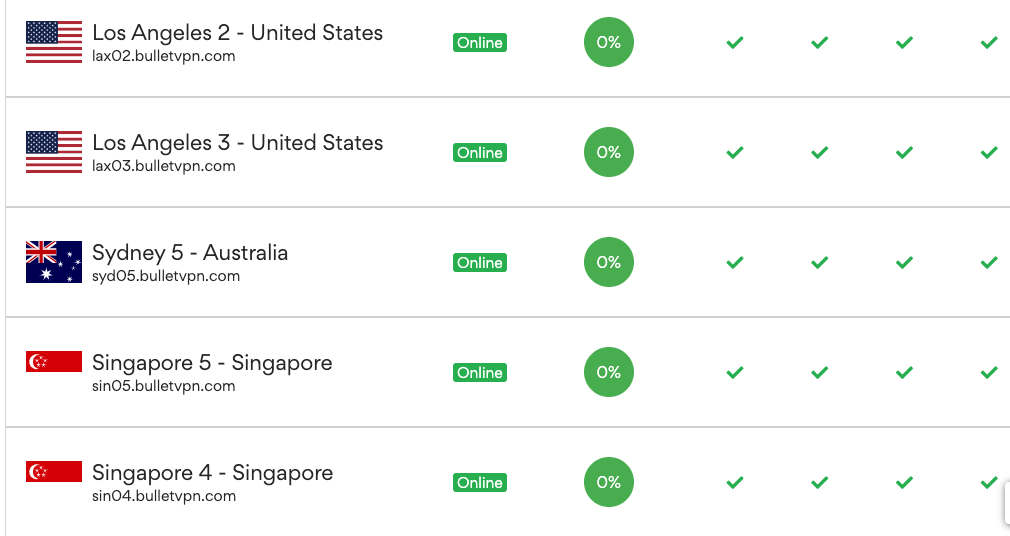
- Type in the VPN server’s name.
The same way your VPN displays it, like lax02.bulletvpn.com.
- Submit your VPN username and password.
Enter your VPN credentials.
- Connect and enjoy.
Click “connect” to set up a VPN connection on your router.
Best VPNs to Consider
Before we show you how to set up a VPN connection on your router, take a look at our top VPN recommendations. After all, you can’t get just any provider because few offer the premium features you need. Free VPNs, are slow, inconsistent, and will end up stealing and selling your data.
Meanwhile, ExpressVPN uses military-grade encryption, an automatic kill switch, and a strict no-logs policy to protect your data and privacy. It also has 3,000+ fast servers in 94 countries to give you reliable access to your favorite websites and apps. Get a full refund if you’re dissatisfied with the service, thanks to the 30-day money-back guarantee.
And if you don’t like the sound of that, check out the other elite VPNs on our list.

- 30-Day Money-back Guarantee
- Unlimited Bandwidth
- Apps For All Your Devices
- 24/7 Live Support


Method A: VPN-Compatible Routers
If you have a router that supports VPN clients, follow the below steps to set up a VPN on your router, regardless of the router manufacturer:
- Type your router’s IP address in any browser’s address bar. The IP should be at the back of your router, and it starts with “192.168.x.x” or “10.0.x.x.”
Alternatively, if you’re a Mac user, click the Apple icon at the top left of your screen -> System preferences -> Network -> Select your Wi-Fi connection -> click Advanced -> select TCP/IP. The IP address will be under “router.”
For Windows users, go to the Control Panel -> Network and Internet -> select your Wi-Fi connection -> click details. The IP address will be under IPV4 Default Gateway. - Then, enter your router’s username and password.
- From the control panel on the left, choose “VPN.”

- Select PPTP or L2TP Client.
- Type in the VPN server name as provided by your VPN service (lax02.bulletvpn.com). Here are a few examples of BulletVPN server names.
- Enter your username and password as provided by your VPN service provider. Then finally, click “connect.”


The specific steps for configuring your router for a VPN client are usually available in the Help & Support documentation of the router manufacturer.
Once you have the VPN client up and running, run a few tests to make sure it really hides your IP address and doesn’t leak DNS data. You can use IP checkers and WebRTC leak tests to do that.
Method B: Routers without VPN Clients
Most routers don’t support VPN clients, preventing you from setting up a VPN connection. Therefore, if you have a router that’s non-compatible with VPNs, you need to flash it with DD-WRT firmware. The latter is open-source software that will make your router highly configurable.
In other words, with DD-WRT as your operating system, you’ll have more control over your router, allowing you to unleash additional functions.
However, before flashing your router with DD-WRT, please note that one wrong move can brick the device. Therefore, you must first check if your router is compatible with DD-WRT firmware. Just type the make and model of your router, located on the back of the device, in your browser’s address bar. Then, make sure the firmware you’re downloading matches your router, as the wrong one will brick it.
Downloading and Installing DD-WRT Firmware
Now, since DD-WRT is open-sourced, you’ll find a lot of versions to download. However, it’s better to use BrainSlayer’s (the original developer) builds. Download the file that has the same name and make of your router.
Next, you need to set up the hardware you’re going to use (router, PC or laptop, and ethernet cable):
- Turn on your router.
- Plug the ethernet cable into one of your router’s LAN ports, then plug the other end into your PC or laptop’s LAN port.
- Turn off your Wi-Fi connection to avoid bricking the router.
Once you complete setting up your hardware, you can move onto installing the DD-WRT you downloaded earlier on your router:
- Go to your router’s admin page by typing the IP info that’s on the back of the device into your browser address bar. The IP address will start with “192.168.x.x” or “10.0.x.x.”
- Sign in to your account and head over to the Admin section.
- Select Firmware Upgrade, followed by “select file.”
- Upload the DD-WRT firmware file you downloaded earlier.
- Wait for the router to update.
Feel free to turn your router back on once the installation is complete. Then, go back to the admin page, where you may be required to enter a username and password. The default credentials are root/admin. After you sign in, you’ll see the page of your DD-WRT-flashed router.
We also recommend you hard-restart your router after this process. Just tap and hold the restart button for 30 seconds, unplug the router for the same period of time, then plug it back in.
How to Install a VPN on Your Router
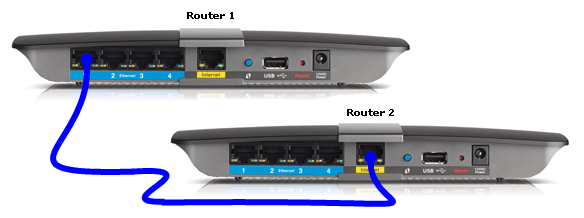
Now that you have DD-WRT firmware installed on your router, you can proceed to set up a VPN connection without any obstacles. Alternatively, if you want to install a VPN on your router without making any alterations to your connection, you can always purchase a VPN-compatible router and connect it to your actual router via an ethernet cable.
Simply plug the cable in your actual router’s LAN port then plug the other end in the VPN-supported router’s WAN port.
Either way, here’s how to set up a VPN on your router now that it features DD-WRT firmware (Let’s assume that you subscribed to ExpressVPN):
- Sign in to your ExpressVPN account.
- Select “Setup ExpressVPN,” -> “Manual Config,” then “OpenVPN“.
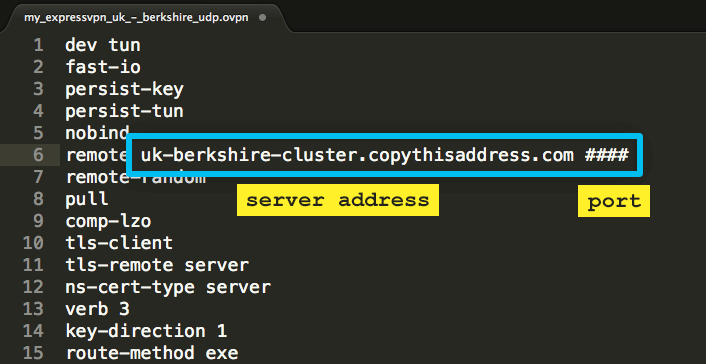
- Download the ‘.ovpn’ file to your PC or Mac.
- Now, open your router configuration (type the IP address on the back in your browser’s address bar).
- From the DD-WRT control panel, choose “Services” -> “VPN.”
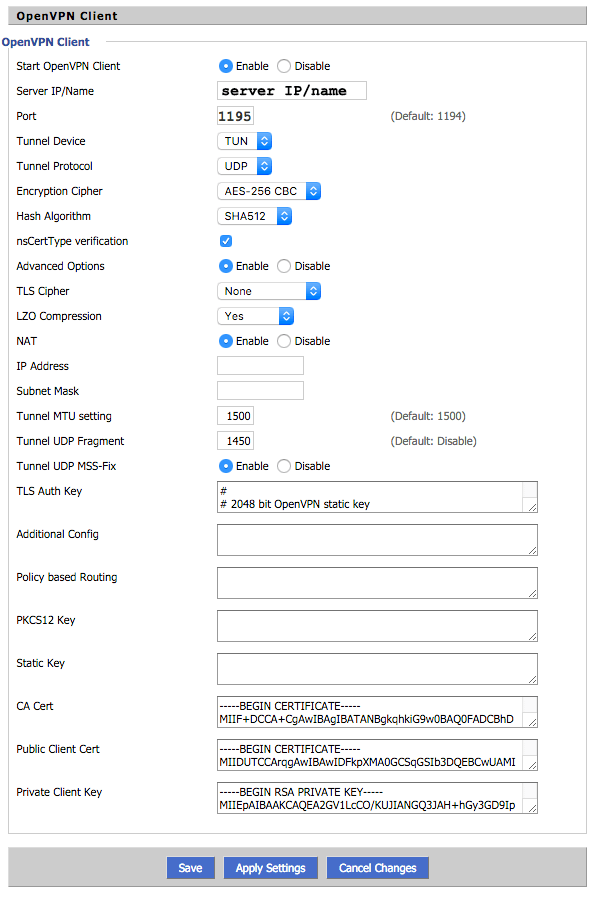
- Now, enable “Start OpenVPN Client.”
- Now, you must enter the necessary information for key fields. These are Server IP/Name, Port, TLS Auth Key, CA Cert, Public Client Cert, and Private Client Key.
- For both Server IP/Name and Port, open the .ovpn config file you downloaded and copy the server address and port.
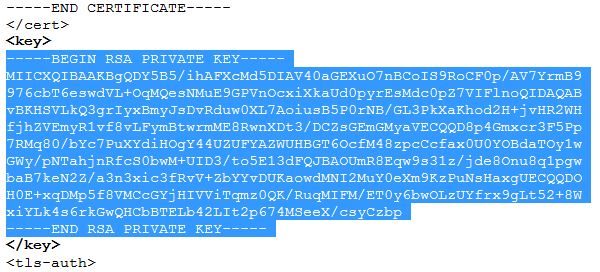
- For the TLS Authentication key, copy the text between <tls-auth> and </tls-auth> from the .opvn file, and paste it in the TLS Auth Key field.
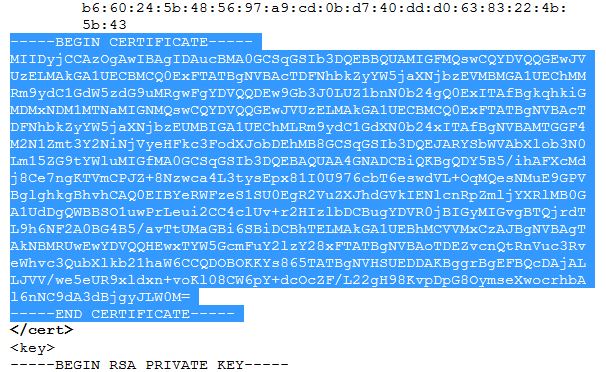
- As for CA cert, copy the text between <ca> and </ca> and paste it in the CA Cert field.
- Then, copy the text between <cert> and </cert> and paste it in the Public Client Cert field.
- And finally, copy the text between <key> and </key> and paste it in the Private Client field.
- Now, click save -> apply settings to initiate the VPN connection.
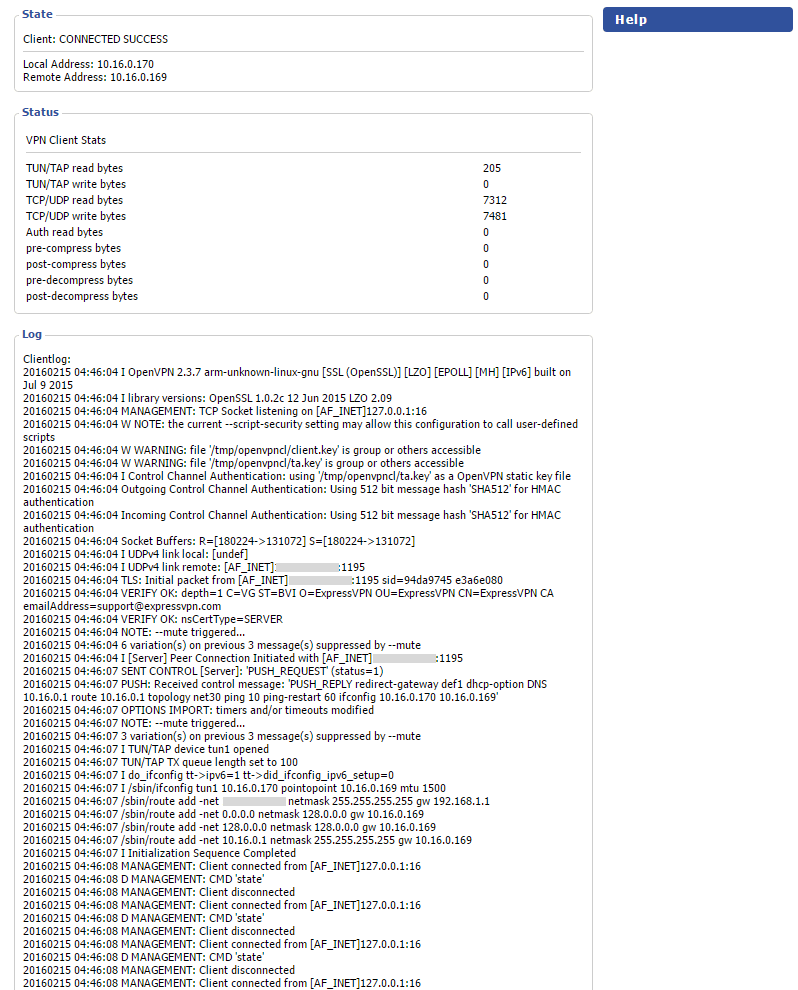
- Then, hit Status > OpenVPN.
- If you followed all the steps correctly, you should see the “Connected Success” status.


Frequently Asked Questions
Thinking about installing a VPN on your router? Here are the most frequent questions our readers asked.
Should I install a VPN on my router?
VPNs protect your privacy and give you full internet access. When you set up a VPN connection on your router, any device connected to your WiFI will enjoy VPN features. That way, you don’t have to restrict yourself to any device limitations. Check out the full advantages.
Can I install a VPN on my home router?
Yes, you can set up a VPN connection no matter which router you own. Some compatible devices are easier to work with, though. Nonetheless, follow our guide to install a VPN on any router.
Are there routers with a built-in VPN?
Flashrouters come with a pre-configured VPN, meaning you won’t have to set one up manually. ExpressVPN and NordVPN are our top recommendations.
Will a VPN router slow down my internet connection?
VPNs consume a bit of your internet speed due to data encryption. But speed drops are minimal, especially if you connect to nearby servers. Besides, VPNs prevent ISP throttling and lag, giving you an uninterrupted streaming and gaming experience.
Which routers work with a VPN?
You can set up a VPN on most routers, especially the newer models. That includes Asus, D-Link, TP-Link, DD-WRT, Tomato, Netduma, Xiaomi, and Sabai.
Install a VPN on Your Router – Final Thoughts
If you only own a couple of devices or have a cable Internet connection, you may not really need to have a VPN on your home or office router.
This is an unlikely scenario, however, as the average household now has at least one smartphone per person, in addition to tablets, computers, and other devices. Therefore, firewall protection is not enough. What you also need is a VPN connection that can protect all your devices at the same time, and the best way to do that is by installing it on your router.
The latter is not unhackable but equipping it with a VPN client adds an extra layer of privacy and security to your data.